Refresh Tokens Done Right: Avoid Common JWT Pitfalls in .NET


In the previous article, we built an ASP.NET Minimal API in .NET 10 with JWT authentication.
In this article, we're going to take the code we wrote last time and extend it to include refresh tokens, so we in effect have our own authentication server. That means saving tokens, so I'll discuss ways of doing that and show you how to implement something simple.
And then, we're going to build a client to call the server and use a refresh strategy to automatically fetch new tokens in the background when we try make a request with an expired JWT.
The concept of refresh tokens comes from the OAuth 2.0 specification and is extended in the draft OAuth 2.1 specification. But OAuth is mostly about delegating authorisation, not authentication, so I'm not going to cover that topic until a (much) later article.
The fact is that to maintain security, an access token must have a short lifetime. We need a way to get a new one. Refresh tokens are the de facto way of doing that.
If you think of a JWT as a match, you can use it to light your cigar as many times as you like until it burns out. Then you'll have to grab your box of matches, which you can think of as the refresh token, and take another match from it to light more cigars with.
This will be quite a long article, so get a cup of coffee and a snack and we'll get started!

Explaining token lifetimes
In the previous article, we had an unprotected /login endpoint which created a JWT and delivered it in the response. We then sent that JWT in the header of our next request to the /protected endpoint to authenticate our request and enable us to see some secret data.
All we had to do to the /protected endpoint was to add RequireAuthorization() to the end of our MapGet endpoint definition and the ASP.NET middleware did the hard work of validating the issuer, audience, token lifetime and signature before mapping claims and deciding whether to allow access or not.
However in the last article, we defined the token to expire in 30 minutes in the SecurityTokenDescriptor and the middleware was configured to check the lifetime of the JWT with ValidateLifetime = true That enabled us to use the JWT to access the protected endpoint for 30 minutes, but after that, it returned a 401 Unauthorized response.
With our rather simple and naive implementation, we could just go back to the /login endpoint, get another JWT and use that to access the protected endpoint. However in a real life production scenario, requiring the client to log back in every 30 minutes is not really acceptable.
Normally, you have to register with the authentication server by giving it a username and password. It creates a user account, stores it in a database, then you have to log in with your username and password. It makes sure you have a user account and if so, it generates a token, saves it in a database and gives it to you. If it already has a token in the database, it doesn't generate another one, it just gives you what it has.
However the token might have expired, so what do you do?
Well, in contrast to the code in the last article, which just gives you a JWT, the normal practise is to give you a JWT access token and an opaque refresh token in the response. Don't worry if you don't understand what I mean by opaque. I'll explain it later.
You can then send a POST request with the refresh token to a /refresh endpoint on the authentication server and assuming the server gave you the refresh token, it will give you another access token and another refresh token.
Although typically, access tokens (our JWT) expire after 15-60 minutes, refresh tokens typically expire after 3-12 months. So, if you just keep refreshing your access tokens when they expire, you never have to log in again until the refresh token expires.
However, we're not going to go into user management; that's not the point of this article. We're going to implement refresh tokens. So we're going to forget about usernames and passwords. What we'll do is a little simpler.
We're just going to create a /register endpoint to give us a Guid as a stand-in for a userId and we're going to rename our /login endpoint from the last article to /token and use that to get a JWT access token and a refresh token when we give it the userId.
Then we're going to add a /refresh endpoint to refresh our tokens and we're going to change the /protected endpoint from the last article to /user to get some protected user information.

Building our authentication server
All code for this article is already written and can be found in my GitHub repository here:
https://github.com/aaroncpina/Aaron.Pina.Blog.Article.04
So, we create a new ASP.NET Web API project like we did in the last article and add the same Nuget packages. I called it Server in my repo because it's what will be used to serve tokens.
We add an RSA key like last time:
using var rsa = RSA.Create(2048);
var rsaKey = new RsaSecurityKey(rsa);
Then we add JWT authentication and authorisation:
builder.Services.AddAuthentication(JwtBearerDefaults.AuthenticationScheme)
                .AddJwtBearer(Configuration.JwtBearer.Options(rsa));
builder.Services.AddAuthorization();
Configuration
You may be wondering what the Configuration class looks like. That's here:
public static class Configuration
{
    public static class JwtBearer
    {
        public static Action<JwtBearerOptions> Options(RSA rsa) =>
            options =>
            {
                options.TokenValidationParameters = new()
                {
                    ClockSkew = TimeSpan.Zero,
                    ValidateIssuer = true,
                    ValidIssuer = "https://localhost",
                    ValidateAudience = true,
                    ValidAudience = "https://localhost",
                    ValidateLifetime = true,
                    ValidateIssuerSigningKey = true,
                    IssuerSigningKey = new RsaSecurityKey(rsa.ExportParameters(false))
                };
                options.MapInboundClaims = false;
            };
    }

    public static class DbContext
    {
        public static void Options(DbContextOptionsBuilder builder) =>
            builder.UseSqlite("Data Source=tokens.db");
    }
}
When it comes to the JwtBearerOptions in effect, we're doing exactly the same as we did in the last article, so I won't explain it here. There are however, two differences:
There is a ClockSkew setting. If you don't set this, it defaults to 5 minutes. The middleware uses it when it checks your token for expiry. If your token is set to expire after 5 minutes, it adds another 5 minutes to compensate for drift between the clocks on your client and server. I've set it to TimeSpan.Zero because we're going to run the client and server on the same machine.
I'm also setting MapInboundClaims = false because if we don't, the middleware will map our sub claim to a name claim and that's not what we want. In the JWT specification, the user is specifically identified by the sub claim, so when we set it, we want it to stay like that.

Database
You can see that the second static class in Configuration is setting Entity Framework database options for a SQLite database.
In a real production API, you'd be using a proper database like SQL Server, Oracle, Postgres or a cache like Redis. But to make things simple, we're going to use SQLite because it stores the whole database as a local file and we can use Entity Framework to do simple CRUD operations. So adding the relevant Entity Framework Nuget package is the first thing to do. I'm using .NET 10 and at the time of writing this article, this is the latest version:
Microsoft.EntityFrameworkCore.Sqlite v10.0.2
Just add that to your server project via your IDE's package manager or via the command line using dotnet add package.
Next we're going to add a repository and DbContext to dependency injection:
builder.Services.AddScoped<TokenRepository>();
builder.Services.AddDbContext<TokenDbContext>(Configuration.DbContext.Options);
The TokenDbContext has a Tokens table and it looks like this:
public class TokenDbContext(DbContextOptions<TokenDbContext> options) : DbContext(options)
{
    public DbSet<TokenEntity> Tokens => Set<TokenEntity>();
}
The table that stores the tokens is called TokenEntity and it looks like this:
public class TokenEntity
{
    public Guid     Id           { get; init; } = Guid.NewGuid();
    public Guid     UserId       { get; init; }
    public string   Token        { get; set;  } = string.Empty;
    public string   RefreshToken { get; set;  } = string.Empty;
    public DateTime ExpiresAt    { get; set;  }
    public DateTime CreatedAt    { get; init; }
}
The TokenRepository has some basic methods to save, update and retrieve tokens:
public class TokenRepository(TokenDbContext dbContext)
{
    public void SaveToken(TokenEntity token)
    {
        dbContext.Add(token);
        dbContext.SaveChanges();
    }

    public void UpdateToken(TokenEntity token)
    {
        dbContext.Update(token);
        dbContext.SaveChanges();
    }

    public TokenEntity? TryGetTokenByUserId(Guid userId) =>
        dbContext.Tokens.FirstOrDefault(t => t.UserId == userId);

    public TokenEntity? TryGetTokenByRefreshToken(string refreshToken) =>
        dbContext.Tokens.FirstOrDefault(t => t.RefreshToken == refreshToken);
}
Now before you start complaining that "it's not SOLID" and I'm "not building to interfaces" so "how can I mock it for unit tests?" Trust me, this article is going to be long enough as it is without adding more interfaces and tests.
You can do that if you want to, but I'm trying to give you the bare minimum code that enables you to understand and implement refresh tokens and nothing more.
So after we app.Build() the first thing to do is:
app.UseAuthentication();
app.UseAuthorization();
And next thing we're going to do is make sure the database is created and set up:
using (var scope = app.Services.CreateScope())
    scope.ServiceProvider.GetRequiredService<TokenDbContext>().Database.EnsureCreated();
The DbContext is created as a scoped service, so we need to create a temporary scope to work with it.
Okay, let's get on to the meat and potatoes of the server, which is the endpoints!

Endpoints
The /register endpoint is easy. We're returning a Guid as a userId to get a token:
app.MapGet("/register", () => Results.Ok(Guid.NewGuid()))
   .AllowAnonymous();
The /token endpoint is where it gets more complicated.
First, I forgot to tell you about our appsettings.json file, which has a setting that we'll need:
{
  "TokenConfig": {
    "TokenLifetime": 1
  }
}
We'll use that to set the lifetime (in minutes) of the token. "Why only one minute? I thought you said tokens are supposed to last for 15-60 minutes?" you may say. I'll explain why later.
We're going to use the options pattern to get this data from the settings file, so we need a class to represent it:
public class TokenConfig
{
    public double TokenLifetime { get; init; } = 10.0;
}
And we need to configure dependency injection to look for it and store it. So add this code after the database configuration stuff we did earlier:
builder.Services.Configure<TokenConfig>(builder.Configuration.GetSection(nameof(TokenConfig)));
Okay, with that out of the way, here's the code for the /token endpoint:
app.MapGet("/token", (IOptionsSnapshot<TokenConfig> config, TokenRepository repository, Guid userId) =>
    {
        var existing = repository.TryGetTokenByUserId(userId);
        if (existing is not null)
        {
            return Results.BadRequest(new
            {
                Error = "User already has an active token",
                Message = "Use the /refresh endpoint with your refresh token to get a new token"
            });
        }
        var now = DateTime.UtcNow;
        var exp = now.AddMinutes(config.Value.TokenLifetime);
        var entity = new TokenEntity
        {
            UserId = userId,
            ExpiresAt = exp,
            CreatedAt = now,
            RefreshToken = TokenGenerator.GenerateRefreshToken(),
            Token = TokenGenerator.GenerateToken(rsaKey, userId, now, config.Value.TokenLifetime)
        };
        repository.SaveToken(entity);
        return Results.Ok(entity.ToResponse());
    })
   .AllowAnonymous();
Dependency injection will pass in the TokenConfig object so we can get the token lifetime and it will also pass in the TokenRepository so we can get tokens from and save tokens to the database. It also takes a userId and it's easiest to pass that to the endpoint in the query string like /token?userId=0e6d1dde-92b8-40fc-8a8e-6c9a8be2913a
So in the endpoint, if you follow the logic, we:
- Check if the user already has a token stored in the database.
- If they do, we tell them to get a new one from the
/refreshendpoint. - Otherwise, we create a JWT in exactly the same way that we did in the last article.
- We create a refresh token. I'll explain this below because it's done in a helper class.
- The tokens are saved to the database.
- The tokens are mapped to a
TokenResponseDTO object (I'll show you this below). - The
TokenReponseis returned in the response.
Okay, the helper class to create the JWT access token and the opaque refresh token looks like this:
public static class TokenGenerator
{
    public static string GenerateToken(RsaSecurityKey rsaKey, Guid userId, DateTime now, double expiresIn)
    {
        var tokenDescriptor = new SecurityTokenDescriptor
        {
            IssuedAt = now,
            Issuer = "https://localhost",
            Audience = "https://localhost",
            Expires = now.AddMinutes(expiresIn),
            Subject = new ClaimsIdentity([new Claim("sub", userId.ToString())]),
            SigningCredentials = new SigningCredentials(rsaKey, SecurityAlgorithms.RsaSha256)
        };
        var handler = new JwtSecurityTokenHandler();
        var token = handler.CreateToken(tokenDescriptor);
        return handler.WriteToken(token);
    }

    public static string GenerateRefreshToken(int length = 32) =>
        Base64Url.EncodeToString(RandomNumberGenerator.GetBytes(length));
}
The GenerateToken method should look familiar to you. That's because it's a (slightly refactored) copy of the token generation method that we used in the last article.
The GenerateRefreshToken method is super simple. We generate a big random number and Base64 URL encode it. How we generate it should be simple to understand because I explained this concept in the article on building a JWT from scratch.
In the OAuth specification, the refresh token is defined as a:
string which is considered opaque to the client.
This means that to the client, the refresh token is just a meaningless, random-looking string. It has no idea (and is not supposed to have any idea) what the characters mean, how long the token is valid for, which user it belongs to, what scopes it has, or anything else. The client just blindly sends the exact string back to the authentication server when it wants to refresh.
The TokenResponse is a DTO, so it's defined as a record because we're not going to mutate it:
public record TokenResponse(string Token, string RefreshToken, double ExpiresIn);
But we should create a library project to store it in, so that the server and the client (when we get to it) can both use it. I called the shared project Shared in my repo.
Lastly, before moving onto the next endpoint, there is a small mapping extension to make mapping from a TokenEntity to a TokenReponse easy:
public static class TokenExtensions
{
    extension(TokenEntity token)
    {
        public TokenResponse ToResponse() =>
            new(token.Token, token.RefreshToken, token.ExpiresAt.Subtract(DateTime.UtcNow).TotalSeconds);
    }
}
Okay, the next endpoint is the /refresh endpoint and it looks like this:
app.MapPost("/refresh", (IOptionsSnapshot<TokenConfig> config, HttpContext context, TokenRepository repository) =>
    {
        var refreshToken = context.Request.Form["refresh_token"].FirstOrDefault();
        if (string.IsNullOrEmpty(refreshToken)) return Results.BadRequest();
        var existing = repository.TryGetTokenByRefreshToken(refreshToken);
        if (existing is null) return Results.Unauthorized();
        var now = DateTime.UtcNow;
        var exp = now.AddMinutes(config.Value.TokenLifetime);
        existing.ExpiresAt = exp;
        existing.RefreshToken = TokenGenerator.GenerateRefreshToken();
        existing.Token = TokenGenerator.GenerateToken(rsaKey, existing.UserId, now, config.Value.TokenLifetime);
        repository.UpdateToken(existing);
        return Results.Ok(existing.ToResponse());
    })
   .AllowAnonymous();
Dependency injection will pass in TokenConfig so we can access configuration, the TokenRepository so we can access the database and the HttpContext so we can access the HTTP request.
The HttpContext is like a wrapper around the current request, the response that is being built and the user associated with them both.
There are two things to mention about this endpoint.
- It is a POST endpoint not a GET endpoint like the others. That means we expect something (in this case, the refresh token) to be sent in the body of the request.
- The refresh token must be sent using the slightly old-school
application/x-www-form-urlencodedformat; that's what the OAuth specification requires for the token endpoint. It's basically just key-value pairs, the same way browsers send HTML form data.
So, in this endpoint, what we're doing is:
- Trying to get the refresh token from the request body. In the OAuth specification it requires us to name the key
refresh_tokenso I'm also recommending it here. That way, when I eventually write an article about OAuth, you'll already be used to doing it in the agreed-upon way. - If we don't manage to follow the happy path in this endpoint, we're just going to return a
BadRequestresponse. Normally you'll send some insightful error message with it in JSON format, but for the purposes of this demo I'll keep it succinct. - Then we're looking in the database for a
TokenEntitythat has a refresh token which matches the refresh token we retrieved from the request body. - If we did find one, it means we sent it in the first place, so we're okay giving the user a new one. So, we generate a new JWT token and a new refresh token. You may ask "if the refresh token is supposed to last for several months, why are we sending a new one with every token refresh?" and the answer is predictably "it says to do so in the OAuth specification". But really, it's for extra security.
- We put the new tokens in the
TokenEntitywith a new expiry date calculated using the token lifetime from configuration and we update the record in the database. - Lastly we convert the
TokenEntityinto aTokenResponseand return it to the client.
Alright, so that leaves one more endpoint, before our authentication server implementation is complete, and that is the /user endpoint. This is our only protected endpoint:
app.MapGet("/user", (HttpContext context) =>
    {
        if (!long.TryParse(context.User.FindFirstValue("exp"), out var exp)) return Results.Unauthorized();
        if (!Guid.TryParse(context.User.FindFirstValue("sub"), out var userId)) return Results.Unauthorized();
        var response = new UserResponse(userId, DateTime.UtcNow, DateTimeOffset.FromUnixTimeSeconds(exp).DateTime);
        return Results.Ok(response);
    })
   .RequireAuthorization();
To access this endpoint, we send the JWT in the request header as described in the previous post.
To describe what it's doing is pretty easy:
- We use
FindFirstValueto get the named claims exp (token expiry date) and sub (user id) from the user. We set those all the way back in the/tokenendpoint and they've travelled in the token ever since. - If we don't get those, something went wrong since they should be there, so we send a 401 Unauthorised to say "You can't have this information, sorry".
- Then we generate a
UserResponseusing the data we extracted above. I'll show you what that looks like below. - We return the response to the client.
Here's the TokenResponse DTO:
public record TokenResponse(string Token, string RefreshToken, double ExpiresIn);
Because it's a DTO, we're not going to mutate it, so I defined it as a record type. In my repo, I've stored it in the Shared project so both the client and server can use it.
Lastly, don't forget to do this:
app.Run();Alright! So that's the entire authentication server done and dusted!
Now I'm going to dotnet run it and show you some screenshots of me using Insomnia to test it. I recommend you get the code running yourself and use your favourite method (if you say curl, you're a proper geek) to call those endpoints.

Calling the authentication server endpoints
Okay, the first thing we need to do is get a userId, so we're going to hit the /register endpoint. You can zoom in on the pictures if they're a little small.

Alright, so we got our userId and now we need to send it in the query string to the /token endpoint to get the JWT.
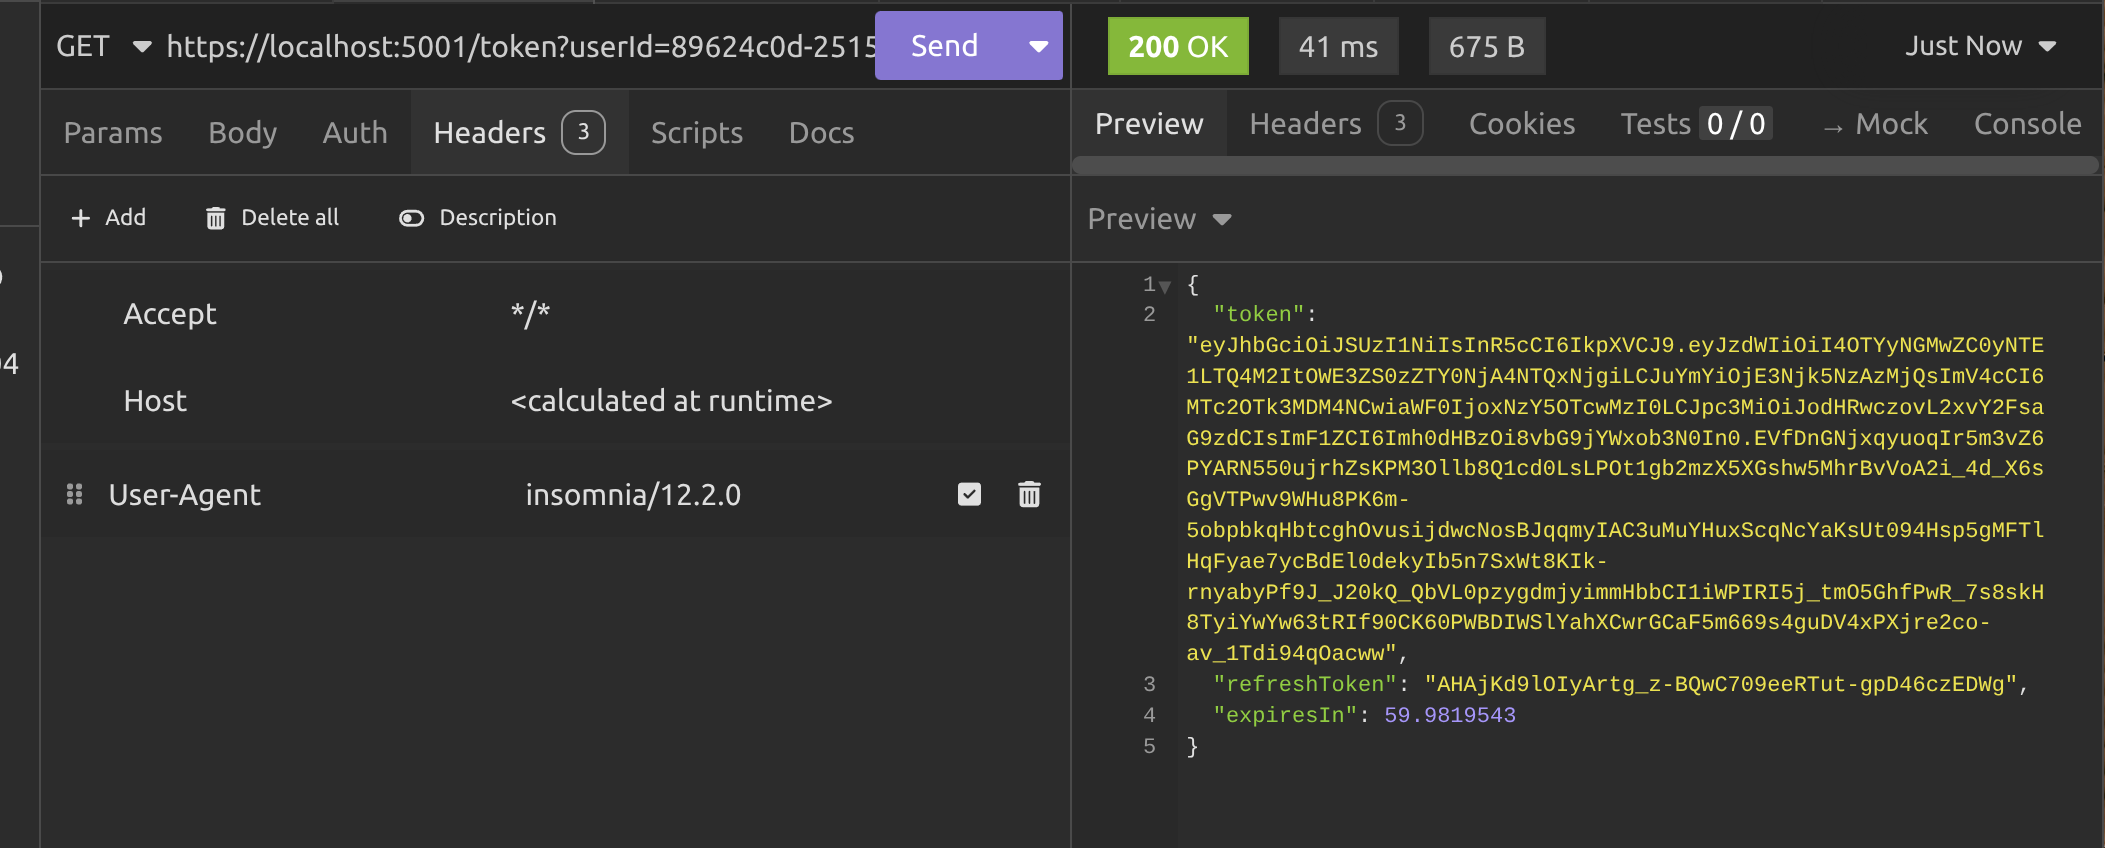
Notice that the token also includes a refresh token and an expiry time (in seconds). Make sure you copy the refresh token and keep it somewhere because we're doing to need it soon!
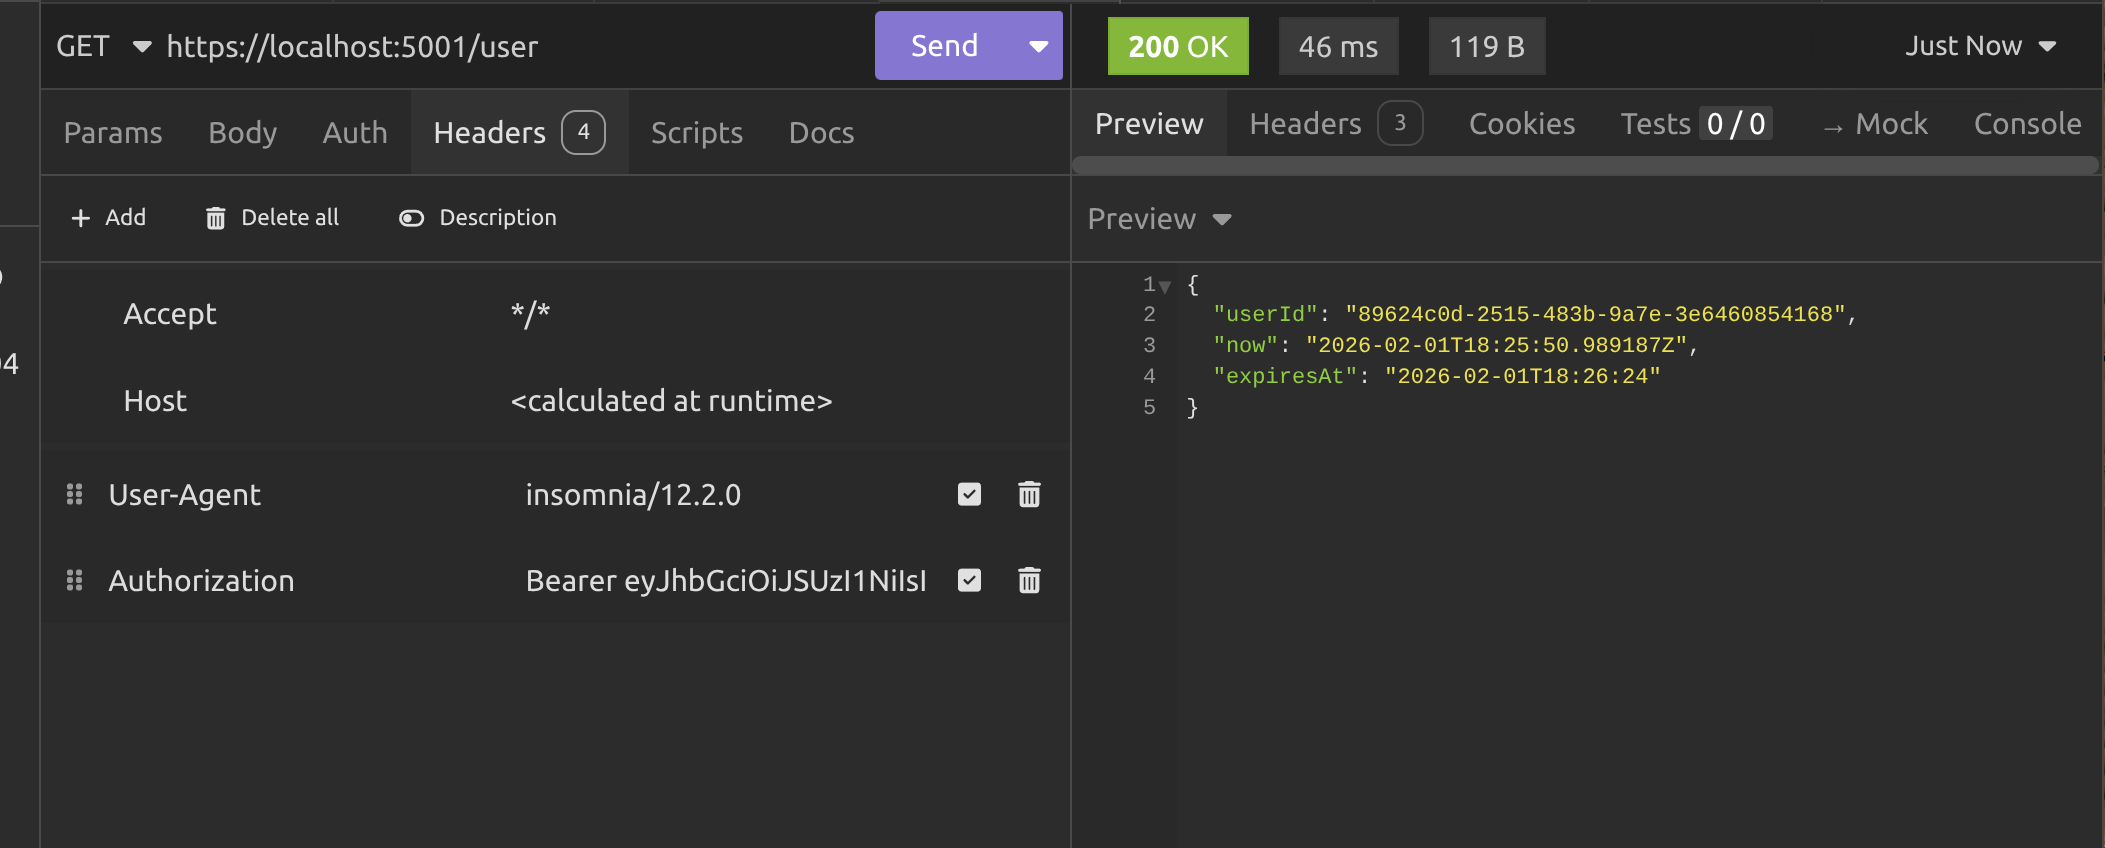
Next we call the /user endpoint with the JWT in the header, exactly like we did in the previous article.
Now we need to wait one minute and call the /user endpoint again.
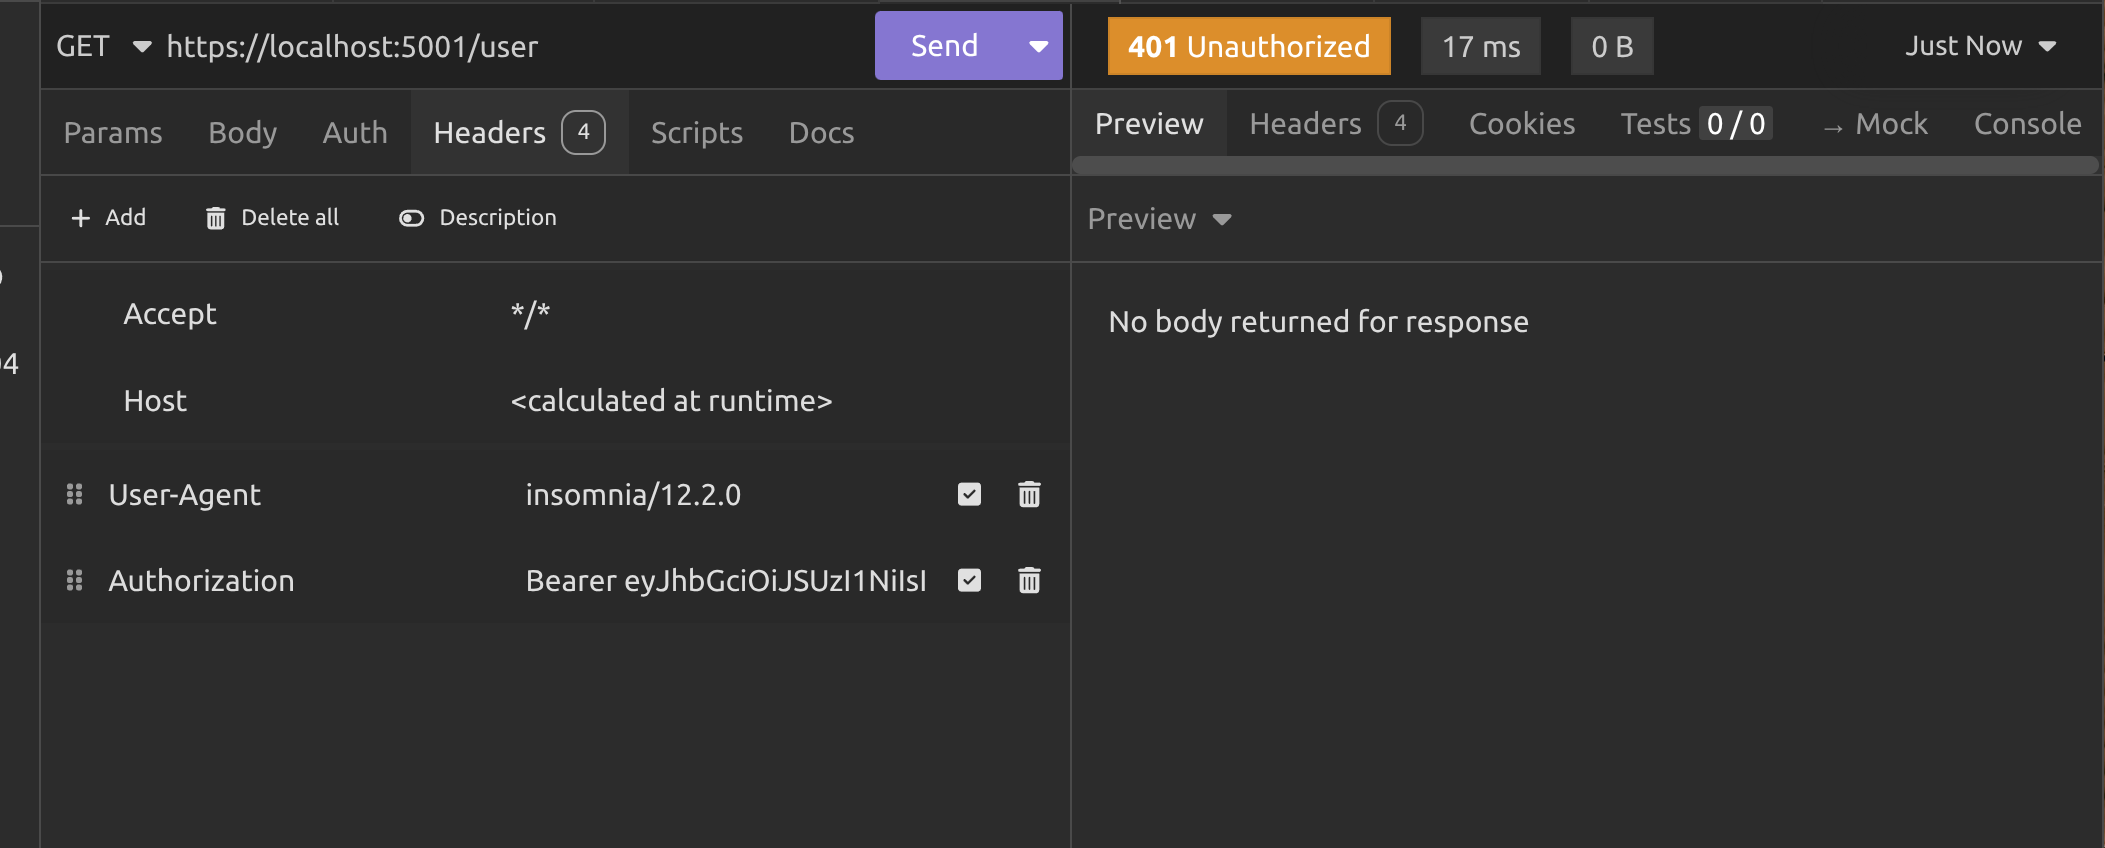
Now you can see why I set the token expiry to one minute. For this demo, we don't want to wait forever to prove that the endpoint returns a 401 Unauthorised response when the token has expired.
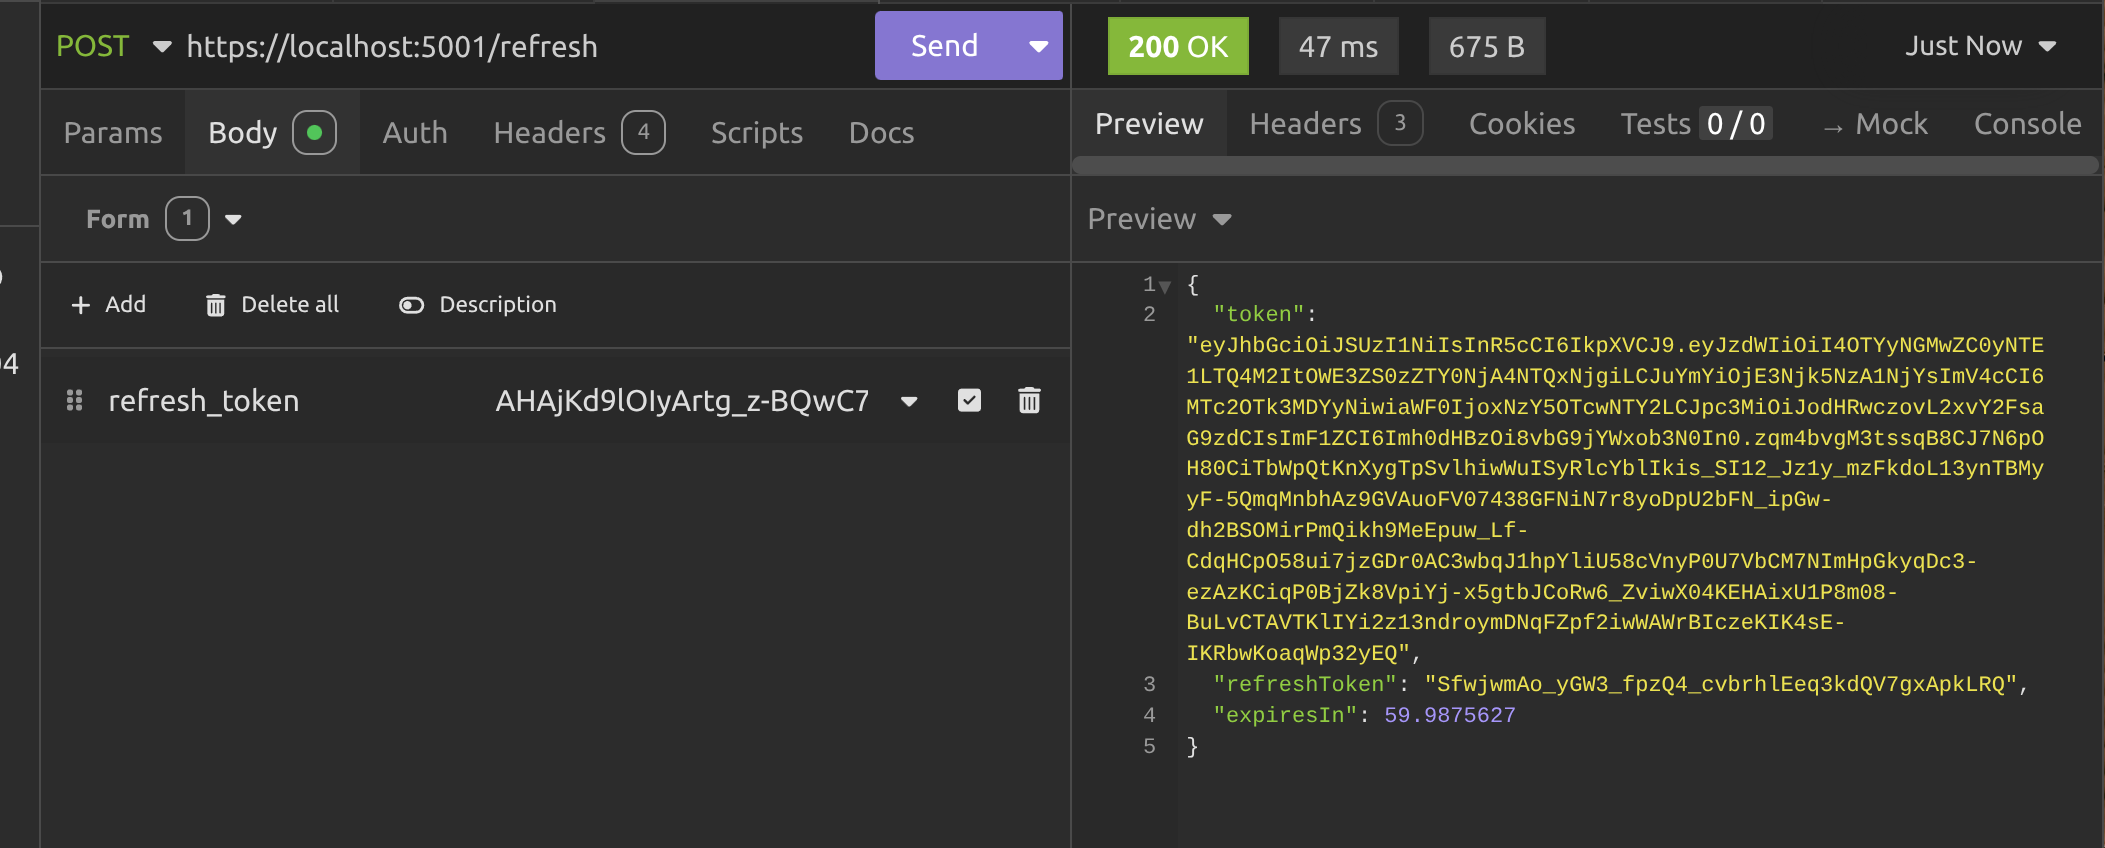
Alright, so now we need to call the /refresh endpoint to get some new tokens. Make sure you're using POST, not GET and make sure the Content-Type in the header is set to application/x-www-form-urlencoded then use the refresh_token key and your refresh token value (I hope you saved it) in the body to make the request.
Okay, so now we've got a new JWT, we can use it on the /user endpoint again and we should get some data. Voila!

Alright, now that we got the authentication server working, it's time to take a sip of coffee we'll get onto the client.

Building the client API
You have to admit that making all of those manual calls to the authentication server was a little bit tedious. What if we could automate it? After all, we're software developers, right?
So that's what we're going to do. Create a client that calls the authentication server and gets the user information. If the JWT has expired, the client will refresh the tokens and try again. We'll never see a 401 Unauthorised response ever again! Hurray!
Alright, so create another ASP.NET Web API project. You know the deal by now. I won't go through the boilerplate now as it's just the same as usual.
So the first thing is, we want to store the JWT, the refresh token and the token expiry locally so we can use them when we call the authentication server. But unlike the server, which needs to keep track of multiple users and tokens, we don't need to do that. We just need one token object, so we're going to create that and store it in dependency injection.
public class TokenStore
{
    public string?  Token        { get; set; }
    public string?  RefreshToken { get; set; }
    public DateTime Expiry       { get; set; }
}
I made it a class, not a record so it's mutable and we can update the values after we refresh them via the authentication server. Let's add it as a singleton service:
builder.Services.AddSingleton<TokenStore>();Now we're going to add a named HttpClient which we'll use to make all of the requests to the authentication server endpoints.
builder.Services.AddHttpClient("server-api", Configuration.TokenServer.HttpClientSettings)
                .ConfigurePrimaryHttpMessageHandler(Configuration.TokenServer.HttpMessageHandlerSettings)
                .AddHttpMessageHandler<TokenRefreshHandler>();
builder.Services.AddScoped<TokenRefreshHandler>();
You may be rubbing your chin and wondering what the hell this TokenRefreshHandler is, but I'll get to that in a minute. I want to show you what's in Configuration first:
public static class Configuration
{
    public static class TokenServer
    {
        public static void HttpClientSettings(HttpClient client)
        {
            client.BaseAddress = new Uri("https://localhost:5001");
            client.Timeout = TimeSpan.FromSeconds(10);
        }

        public static HttpMessageHandler HttpMessageHandlerSettings() =>
            new HttpClientHandler
            {
                ServerCertificateCustomValidationCallback =
                    HttpClientHandler.DangerousAcceptAnyServerCertificateValidator
            };
    }
}
As you can see, in TokenServer.HttpClientSettings we're setting the base address URI for the authentication server (that's why we called the HttpClient "server-api", because we intend to use it to call the server API. We're also setting a timeout for the request.
Now what's the second thing? It looks dangerous! Basically I have that there because I want to stay in the habit of use HTTPS, but I use Pop!_OS, a Linux operating system on my PC, because Windows sucks. The problem is that dotnet dev-certs doesn't work very well on Linux, so the best workaround is to set this ridiculously long-named setting when configuring your HttpMessageHandler; if you're not using Linux or you're running the code in a production environment where you have proper SSL certificates, you don't need this and you can just remove it.
I'm actually going to leave you in mystery for now about the TokenRefreshHandler and show you the two endpoints in this client API. The first one is the /login endpoint:
app.MapGet("/login", async (IHttpClientFactory factory, TokenStore tokenStore) =>
{
    var client = factory.CreateClient("server-api");
    using var registerResponse = await client.GetAsync("/register");
    if (!registerResponse.IsSuccessStatusCode) return Results.BadRequest("Unable to register");
    var userId = await registerResponse.Content.ReadFromJsonAsync<Guid>();
    if (userId == Guid.Empty) return Results.BadRequest("Unable to parse user id");
    using var tokenResponse = await client.GetAsync($"/token?userId={userId}");
    if (!tokenResponse.IsSuccessStatusCode) return Results.BadRequest("Unable to get token");
    var token = await tokenResponse.Content.ReadFromJsonAsync<TokenResponse>();
    if (token is null) return Results.BadRequest("Unable to parse token");
    tokenStore.Expiry = DateTime.UtcNow.AddMinutes(token.ExpiresIn);
    tokenStore.RefreshToken = token.RefreshToken;
    tokenStore.Token = token.Token;
    return Results.Ok("Logged in");
});
It looks like a lot of code. Don't complain about me adding no spaces in-between lines! I'm trying to make this article as short as I can, but also to explain things as well as I can. You can copy the code and add spaces if you like.
I'm sure you can already work it out, but I'll take you through what the code is doing anyway.
Using AddHttpClient to add a HttpClient service also adds a IHttpClientFactory service internally, which enables you to create a HttpClient that manages sockets and caching more efficiently than if you were to create one yourself and leave it hanging around.
So, in the code we're:
- Creating the named
HttpClientto call the authentication server. - Making a request to the
/registerendpoint to get theuserId. - Checking if the request returned a 200 OK response or not.
- If not, returning a 400 Bad Request response with a reason why. From here on, I'm, not going to describe the validation. I'll focus on the happy path.
- Then we're reading the
userIdfrom the response and converting it to aGuidusingReadFromJsonAsync<Guid>to do the job. - We're making a request to the
/tokenendpoint and parsing the content into aTokenResponseobject. - We're updating the
TokenStorewith the values extracted from theTokenResponse. - We're letting the client know that they logged in successfully.
That turns two requests into one and handles copying tokens and stuff, so our life is now a lot easier. This is exactly the sort of thing you'll be doing whenever you build any kind of client system that needs to access protected data.
So we'll turn to the next endpoint, which is the /info endpoint:
app.MapGet("/info", async (IHttpClientFactory factory, TokenStore store) =>
{
    var client = factory.CreateClient("server-api");
    if (client.BaseAddress is null) return Results.BadRequest("Unable to get base address");
    var uriBuilder = new UriBuilder(client.BaseAddress) { Path = "user" };
    using var request = new HttpRequestMessage(HttpMethod.Get, uriBuilder.Uri);
    request.Headers.Authorization = new AuthenticationHeaderValue("Bearer", store.Token);
    using var response = await client.SendAsync(request);
    if (!response.IsSuccessStatusCode) return Results.BadRequest("Unable to get user info");
    var user = await response.Content.ReadFromJsonAsync<UserResponse>();
    if (user is null) return Results.BadRequest("Unable to parse user info");
    return Results.Ok($"User Id: {user.UserId}");
});
Again, we're getting the IHttpClientFactory and TokenStore from dependency injection. I'll take you through the rest of the code:
- We create the named
HttpClient. - This time we have to make a request with a header value, so we're doing things a little differently. We getting the
BaseAddressthat we set inConfigurationand we're appendinguserto it to get the full URI for the/userendpoint on the server. - We're constructing a GET request using the URI from the last step.
- We're adding an
Authorizationheader to the request with the correct value as described in the previous article, which isBearer <JWT>and adding the JWT from the token store to it. - We send the request and (hopefully) get a 200 OK response.
- We parse the response content as a
UserResponseobject. - We return the
UserReponseto the client.
That's only making one request for us, but we're making sure the right tokens are used and they're sent using the correct types of requests. But why did I say "hopefully" we get a 200 OK response?
Because we already know that the /user endpoint is a protected endpoint and we have to be authenticated to access it. If the token has expired, our authentication request will be denied.
So what do we do? That's where the TokenRefreshHandler comes in.
public class TokenRefreshHandler(TokenStore store) : DelegatingHandler
{
    private readonly SemaphoreSlim _refreshLock = new(1, 1);

    protected override async Task<HttpResponseMessage> SendAsync(HttpRequestMessage request, CancellationToken ct)
    {
        var response = await base.SendAsync(request, ct);
        if (response.StatusCode != HttpStatusCode.Unauthorized) return response;
        await _refreshLock.WaitAsync(ct);
        try
        {
            if (string.IsNullOrEmpty(store.Token) || string.IsNullOrEmpty(store.RefreshToken)) return response;
            if (store.Expiry < DateTime.UtcNow)
            {
                request.Headers.Authorization = new AuthenticationHeaderValue("Bearer", store.Token);
                return await base.SendAsync(request, ct);
            }
            var refreshRequest = new HttpRequestMessage(HttpMethod.Post, "https://localhost:5001/refresh");
            var content = new KeyValuePair<string, string>("refresh_token", store.RefreshToken);
            refreshRequest.Content = new FormUrlEncodedContent([content]);
            using var refreshResponse = await base.SendAsync(refreshRequest, ct);
            if (!refreshResponse.IsSuccessStatusCode) return response;
            var tokenResponse = await refreshResponse.Content.ReadFromJsonAsync<TokenResponse>(ct);
            if (tokenResponse is null) return response;
            store.Expiry = DateTime.UtcNow.AddMinutes(tokenResponse.ExpiresIn);
            store.RefreshToken = tokenResponse.RefreshToken;
            store.Token = tokenResponse.Token;
            request.Headers.Authorization = new AuthenticationHeaderValue("Bearer", tokenResponse.Token);
            return await base.SendAsync(request, ct);
        }
        finally
        {
            _refreshLock.Release();
        }
  }
The TokenRefreshHandler inherits from the DelegatingHandler class, which is a special class in .NET that lets you insert custom logic into the pipeline that HttpClient uses to send requests and receive responses.
It's like middleware for outgoing HTTP calls, so every time you make a request with a named HttpClient it passes the request through a chain of handlers. The TokenRefreshhandler sits in that chain and gets to look at every request before it leaves and every response before it comes back.
That makes understanding what the code is doing really simple. It's:
- Getting the response from the server.
- If the status is 401 Unauthorized, it's come from a request to a protected endpoint where either you've not passed a JWT, or you have passed one and the JWT has expired. In that case, we get to run the rest of the code. If not, we just return the response without touching it.
- We're using a
SemaphoreSlimwhich is configured to only allow one request at a time. We're doing it this way to avoid the thundering herd problem and stop race conditions. So waitawaituntil the lock is free and then we're able to do the rest of the logic without interference from other threads. - If the JWT in the token store hasn't expired yet, we pass it to the request in the header and we forward on the request.
- If the token has expired, we create a new POST request to the
/refreshendpoint. This is a background request; a separate request from the one we're handling. - We attach the refresh token to the background request using
FormUrlEncodedContentwhich ensures that the request uses the correct content type. - This background request is sent off to the authentication server and if it's successful, we can parse the content and get a
TokenResponsefrom it. - We update the
TokenStorewith our new tokens, for use in future requests. - We pass the new JWT in the header of the request we're handling.
- Then we send that request off and this time it should work, because it's using a new, unexpired JWT.
- We release the
SemaphoreSlimso that the next request can use this handler.
This strategy is called different names by different people in the community. Common names are:
- Reactive token refresh
- On-demand token refresh
- Automatic token refresh on 401
- Refresh-on-expiry (or refresh-on-unauthorised)
- Deferred / lazy token refresh
- 401-triggered refresh
- Just-in-time token refresh
- Retry-with-refresh
I just call it a "reactive refresh" strategy. Anyway, that's the whole thing. Let's run both of the API's, call the endpoints on the client and see what happens!

Testing the client API
I'm just opening up two terminals; one in the client project folder and one in the server project folder and doing a dotnet run in both.
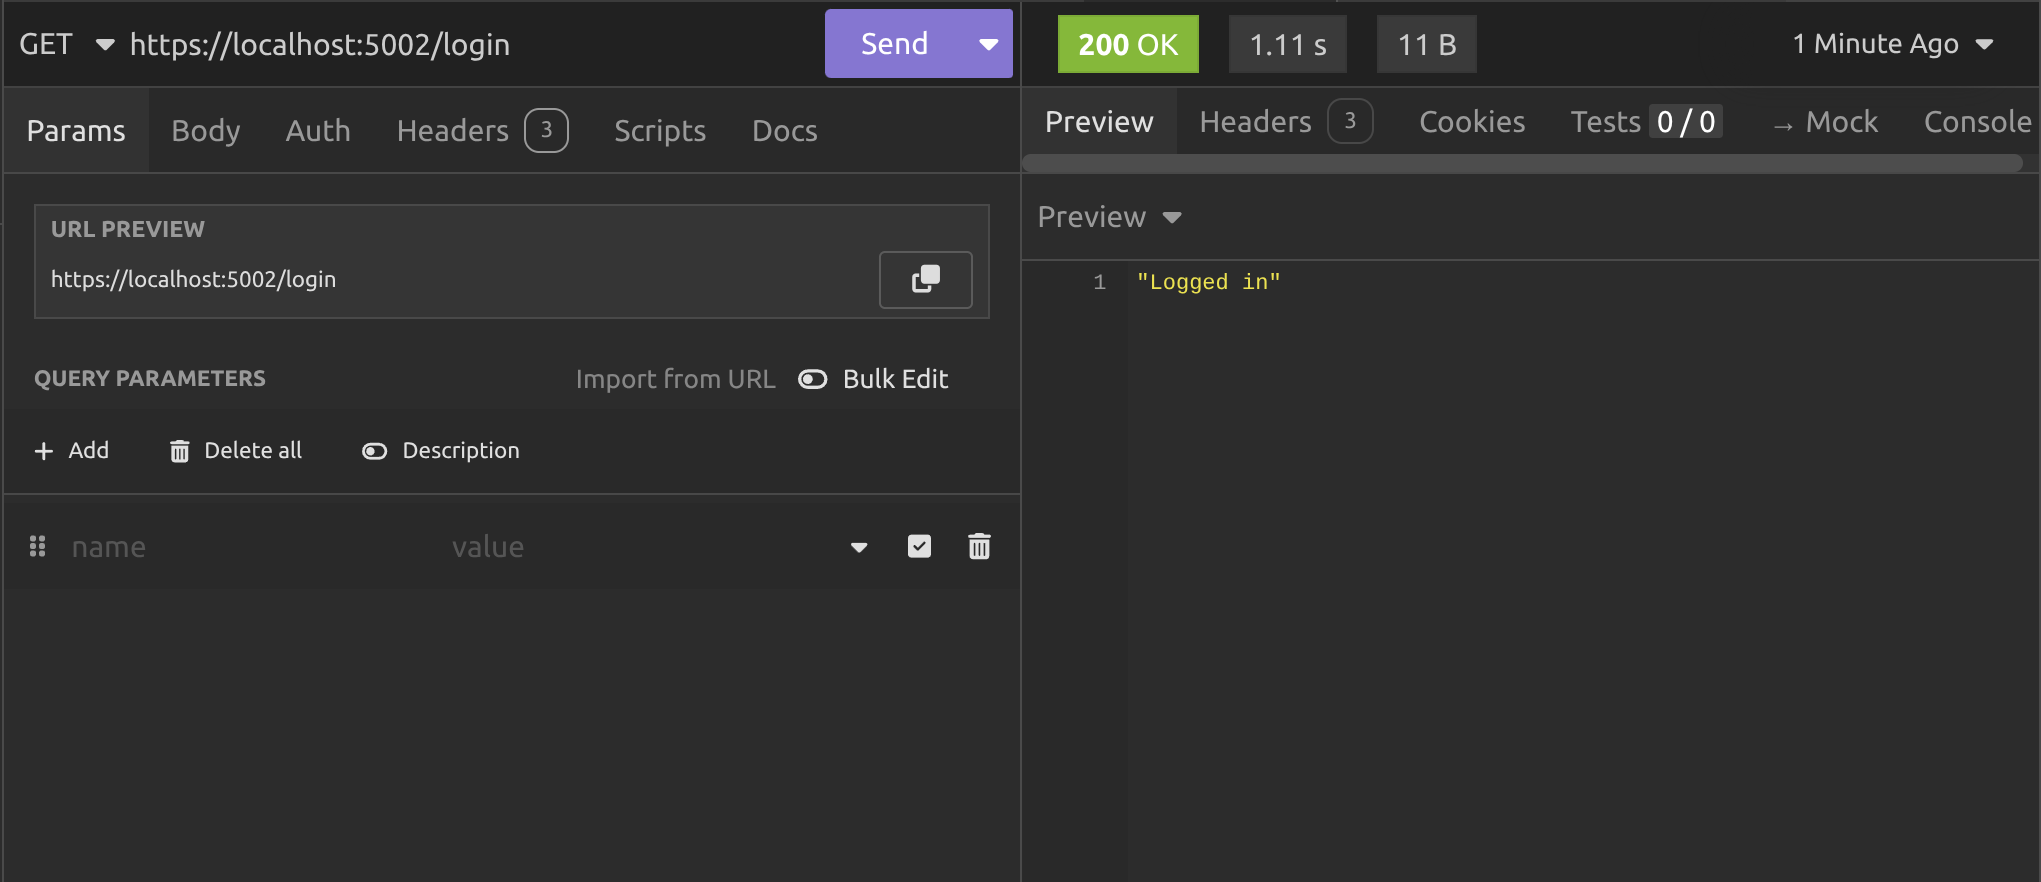
After calling the /login endpoint on the client, we get a response telling us we're logged in. What's more interesting is what the client console output is telling us:

You can clearly see the calls to the /register and /token endpoints. Next we'll call the /info endpoint on the client.
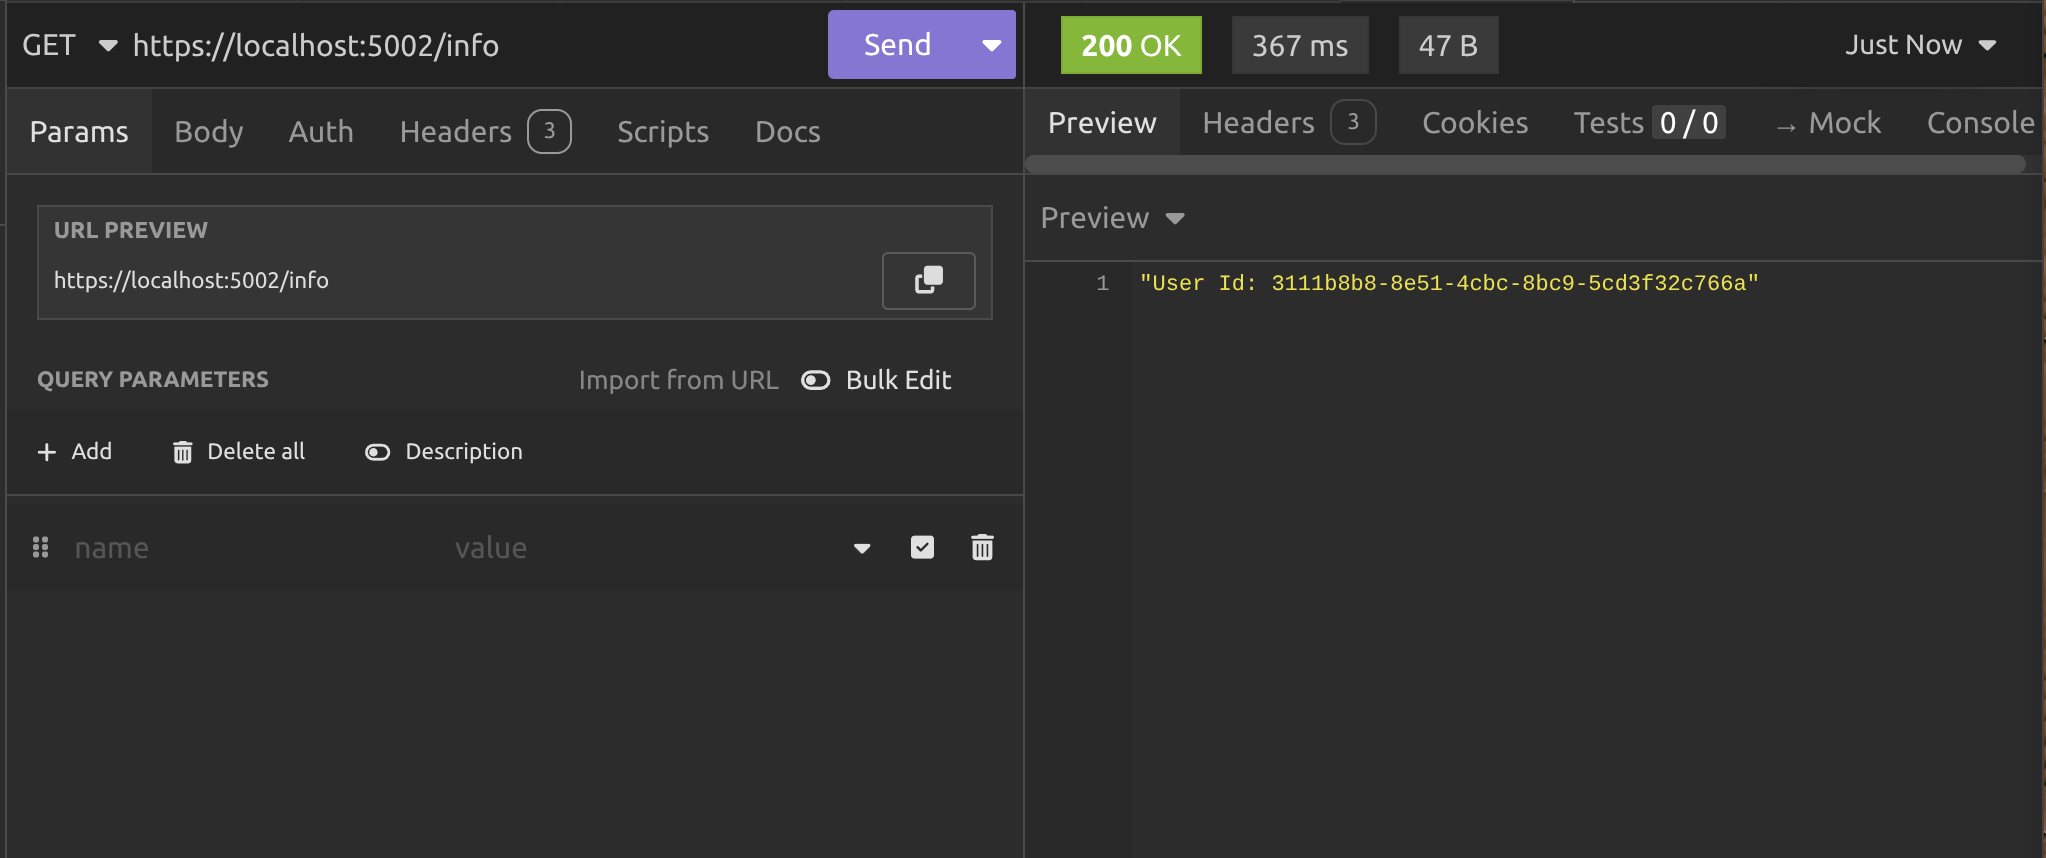
I actually made the above call six minutes after the first call, so normally one might expect to it to fail due to the JWT expiring, but the client console output tells us what happened:
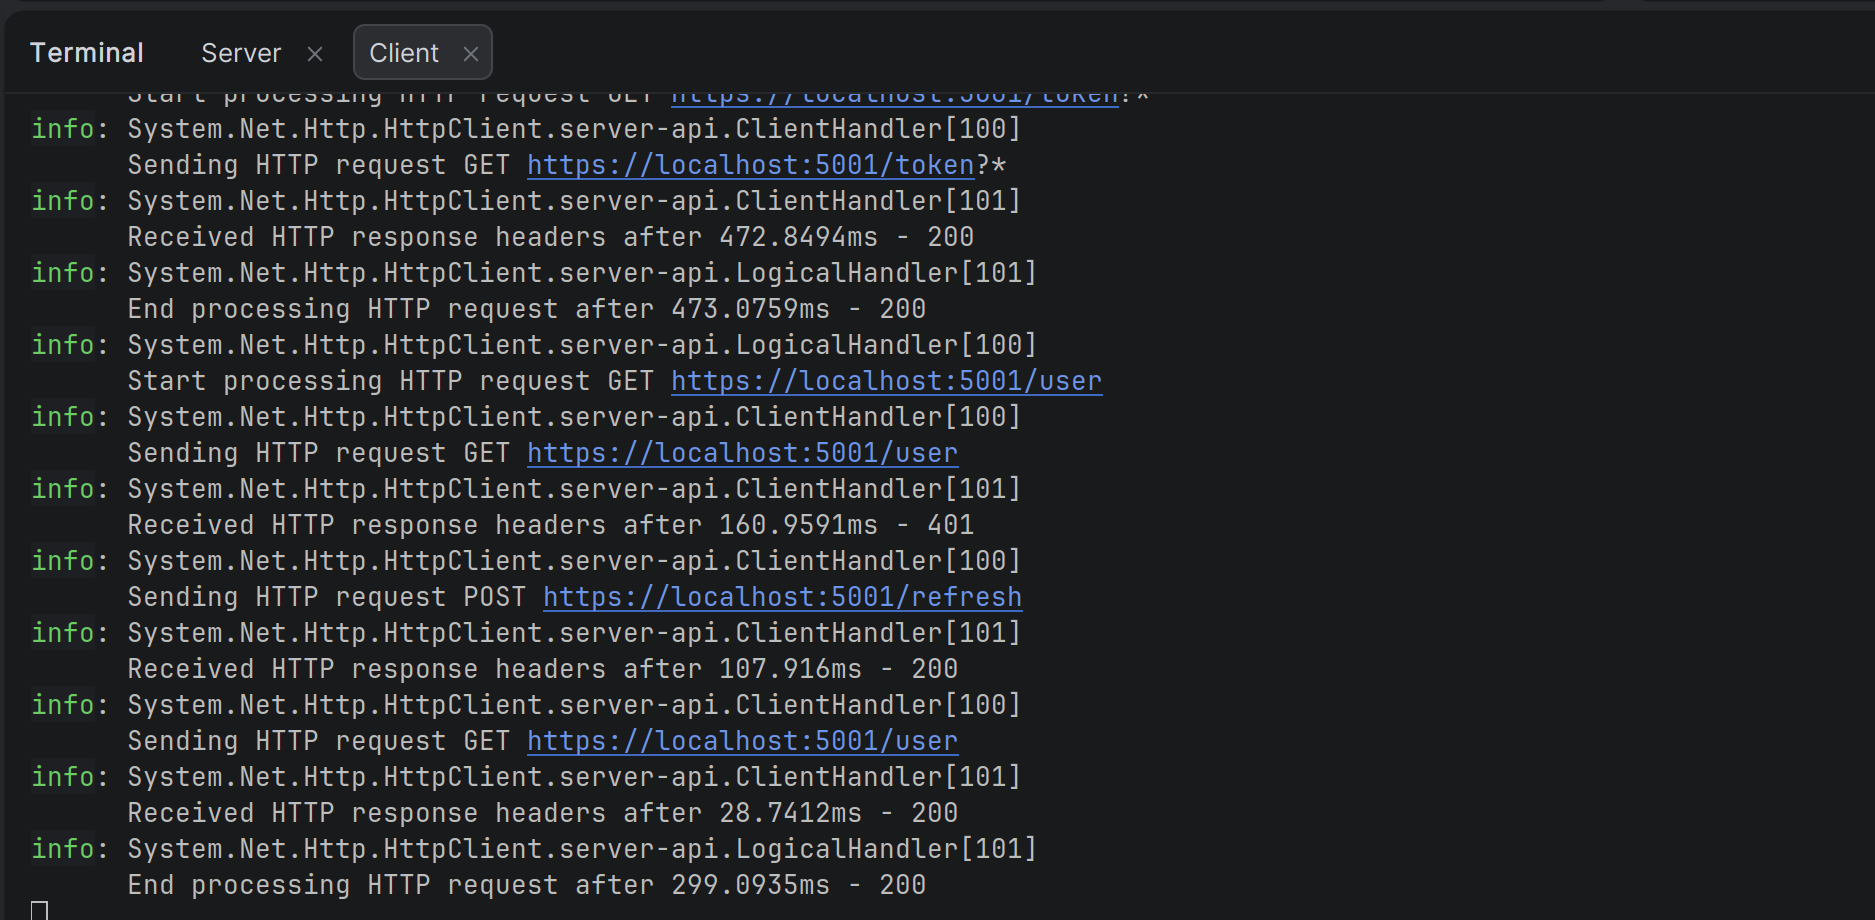
The /user endpoint was called but returned a 401, so it called /refresh got new tokens, updated the header with the new JWT and tried calling /user again. This time it returned a 200 and we can see the result above.
Conclusion
We've now built a full authentication API with registration, endpoints to get tokens and refresh them and a protected endpoint to get user information.
Then we built a client API which uses the authentication API endpoints to login and retrieve protected user information, using a reactive retry strategy to handle authentication failures.
Key takeaways
- Access tokens should be short-lived (15–60 minutes) for security.
- The server issues both an access token (JWT) and a refresh token (opaque string) at initial login.
- The client must never let the refresh token leak.
- When the access token expires, the client has to use the refresh token to get new tokens.
- Refresh token rotation (issuing a new refresh token every time you use the old one) makes the system safer.
- The refresh token is opaque to the client.
- The whole flow is about balancing security and user experience.
After this article, you should feel ready to start building your own authentication servers and the clients to use them. In the next article I'm going to cover other common token refresh strategies.
Enjoyed this hands-on deep dive?
Subscribe (for free) for the full series. Code-heavy guides straight to your inbox.
Questions or your own JWT experiments?
Comment below or connect on LinkedIn / X. Let's master secure .NET APIs together.